If your vehicle’s fan is only working at the highest speed or is malfunctioning at certain speeds, you likely have a faulty blower motor resistor. In this guide, I will walk you through the simple process of replacing this essential component. You’ll learn about the blower motor resistor’s function, how to locate it, and the tools you need to complete the job efficiently.
From Youtube Check here
What is a Blower Motor Resistor?
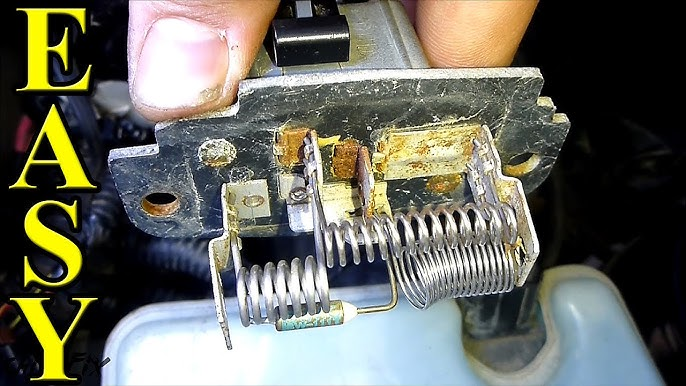
The blower motor resistor is a vital component that controls the speed of the fan in your vehicle’s climate control system. It operates by restricting electricity flowing to the blower motor based on the fan speed setting. When set to low, it restricts the most electricity, resulting in less airflow. However, if it overheats (often caused by high resistance), it can fail and send you back to the drawing board to make repairs.

Symptoms of a Faulty Blower Motor Resistor
You may need to replace your blower motor resistor if you notice:
- The fan only blows at high speed.
- Certain fan speeds do not work or only work intermittently.
- The fan runs at the same speed regardless of the setting.
Tools and Parts Required
Before diving into the installation process, gather the following tools and parts:
- Eight-millimeter socket and ratchet
- Wire stripper
- Electrical connectors
- Black tape
- Dielectric grease (optional for additional protection)
Step-by-Step Replacement Process
Locating Your Blower Motor Resistor
The blower motor resistor is usually found near the blower motor itself. This can be positioned either under the dashboard on the passenger side or in the engine compartment. Here’s how to identify it:
- Passenger Side: Check under the dashboard or behind the glove box.
- Engine Compartment: Look near the blower motor’s location.
Remove the Old Blower Motor Resistor
- Disconnect Power: Take the negative battery terminal off to avoid electrical issues.
- Gain Access: Remove any components obstructing access to the resistor, such as air conditioning connections or cooling ducts.
- Unscrew and Detach: Locate the two screws (typically 8mm), remove them, and gently pull out the old blower fan resistor.
Inspect and Prepare for Installation
After removing the old resistor, inspect the connector (pigtail) for damage:
- If it looks corroded or melted, it will need replacing as well.
- Use your wire stripper to prepare the wiring harness; cut the wires, leaving enough length for a neat connection.
Install the New Blower Motor Resistor
- Apply Dielectric Grease: Coat the outside of the new blower fan resistor with dielectric grease to prevent moisture ingress.
- Insert the Resistor: Position it correctly in place and secure it with the two bolts.
- Reconnect the Pigtail: If replacing it, use crimp connectors, ensuring to match color codes (e.g., green to green, black to black, etc.). Wrap the connections with tape for a clean, insulated look.
Final Steps
- Reconnect Everything: Ensure all parts are tucked away and secured properly.
- Reconnect the Battery: Attach the negative terminal back to restore power.
- Testing: Start your vehicle and test the fan at various speeds to ensure everything works as expected.
Conclusion
By following these steps, replacing your blower motor resistor can be an easy and rewarding task. You’ve not only restored full control over your fan speeds but also gained confidence in your DIY skills. Don’t forget, tackling automotive repairs yourselves can lead to learning valuable vehicle maintenance skills and saving money in the process!
At Risingxx, we are your one-stop wholesale trading partner specializing in auto sensors and other automotive aftermarket products. Whether you need oxygen sensors, tire pressure monitors, or parking sensors, we’ve got you covered. Explore our extensive product line at rsgoauto.com, Facebook or contact us directly at sales@rsgoauto.com to learn how we can support your business.
If you’ve found this guide helpful, be sure to share your success stories and check out more how-to videos for future automotive projects. Happy driving!


Error: Contact form not found.